Bank accounts in HORUS
System: HR Online Remote User System
Amending Bank Accounts or Pay Distributions in HORUS
This user guide will guide you through the steps of removing or adding a Bank account or Payment Distribution in HORUS.
Please note, in cases where an employee has had previous Terminated job records which had a Bank Account associated with them in the past, they may not be able to delete the Bank Account details in the system.
Contact
- HR Systems
- +61 2 6125 9622
- Send email
Steps
Step 1
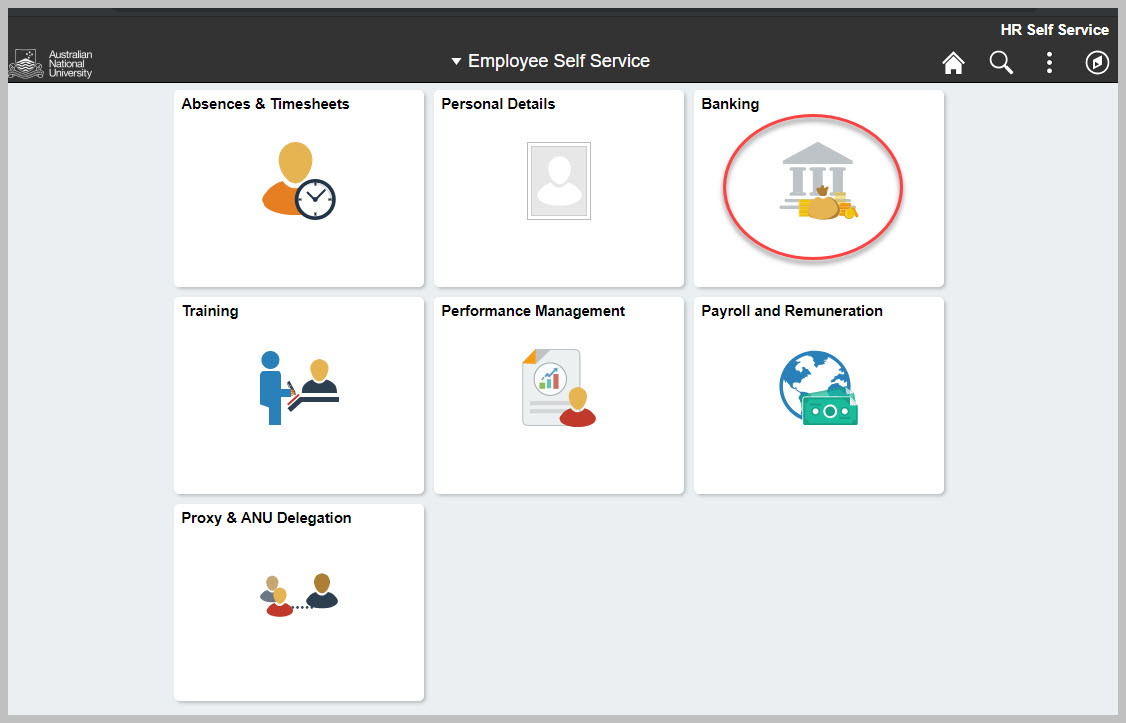
Navigate to Employee Self Service in HORUS
Login to HORUS and select the Banking Tile from Employee Self Service menu

Step 2
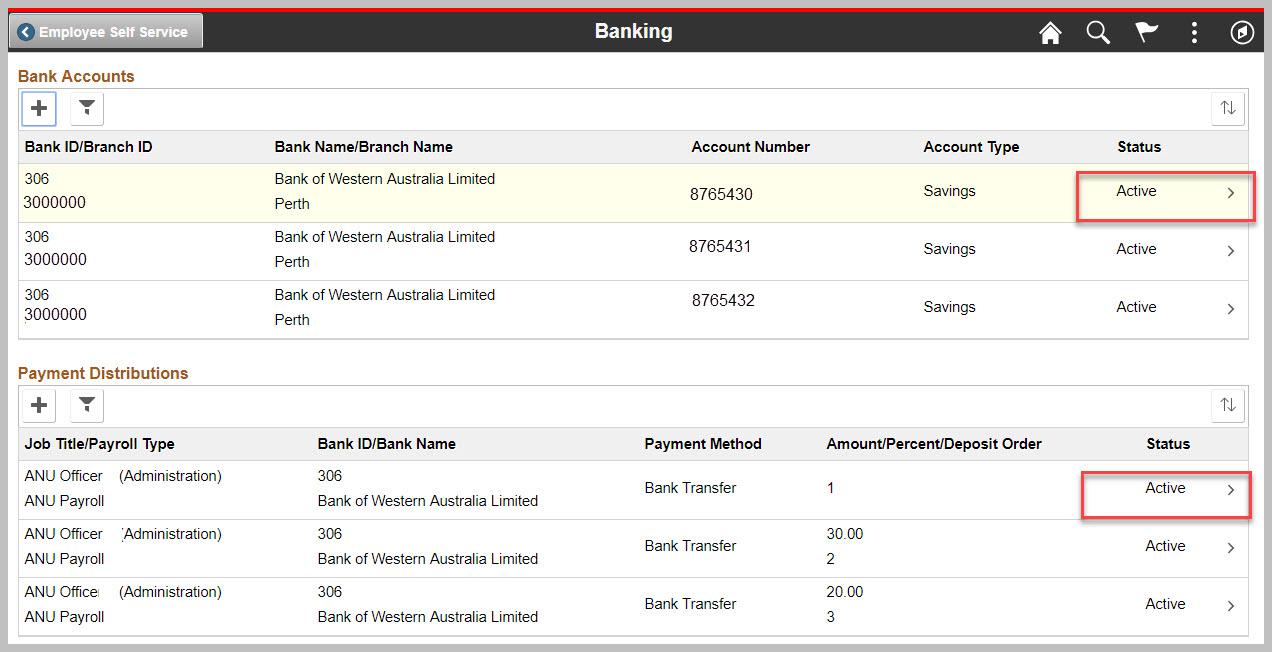
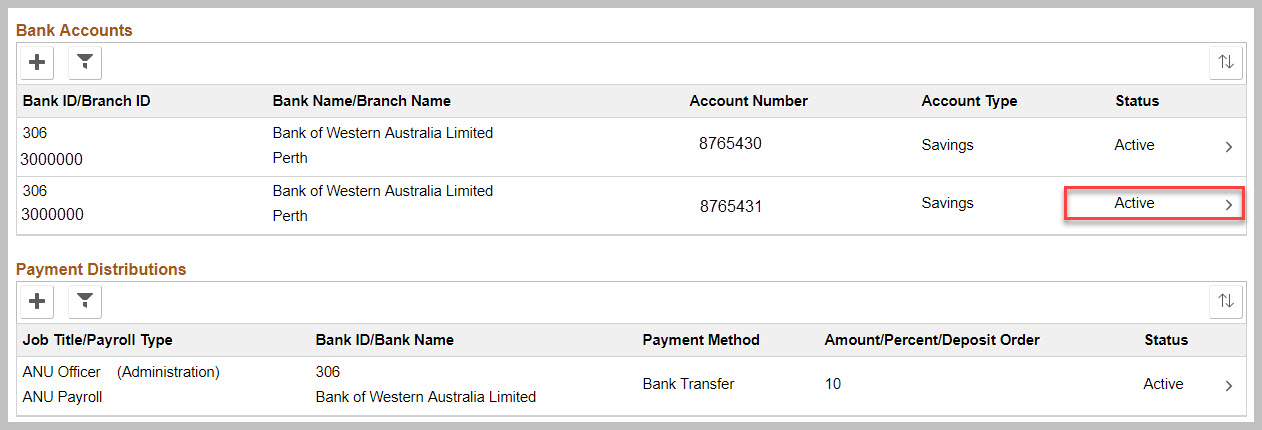
Review your Banking details
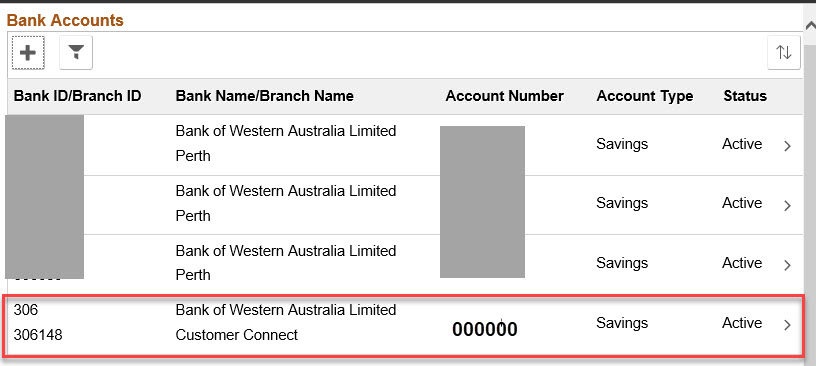
All your Active nominated Bank Accounts and Pay Distributions will appear.

Step 3
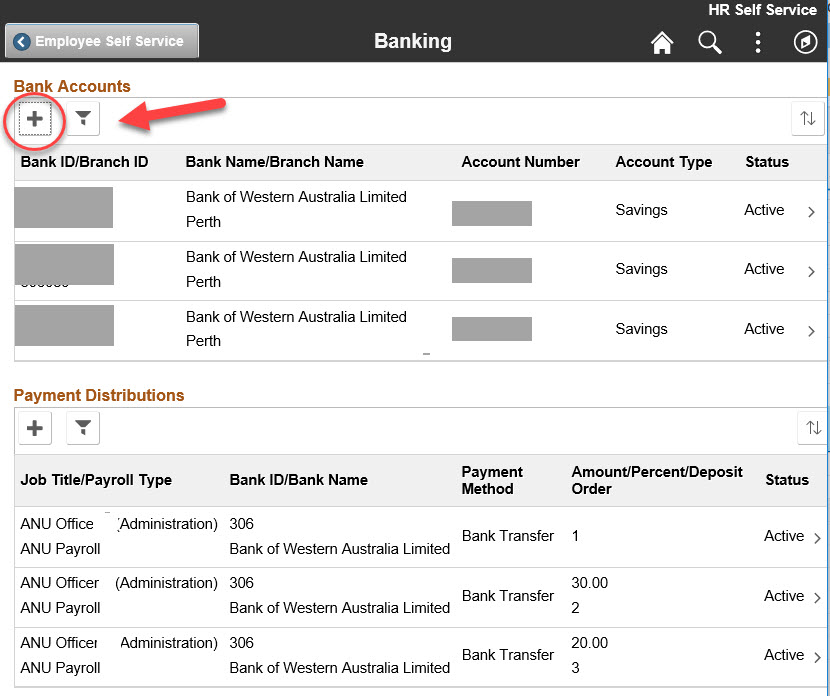
Adding a bank account
All your Active nominated Bank Accounts and Pay Distributions will appear.
In order to add a new bank account, select the "+" option below "Bank Accounts"
Branch ID: this equates to BSB number.

Step 4
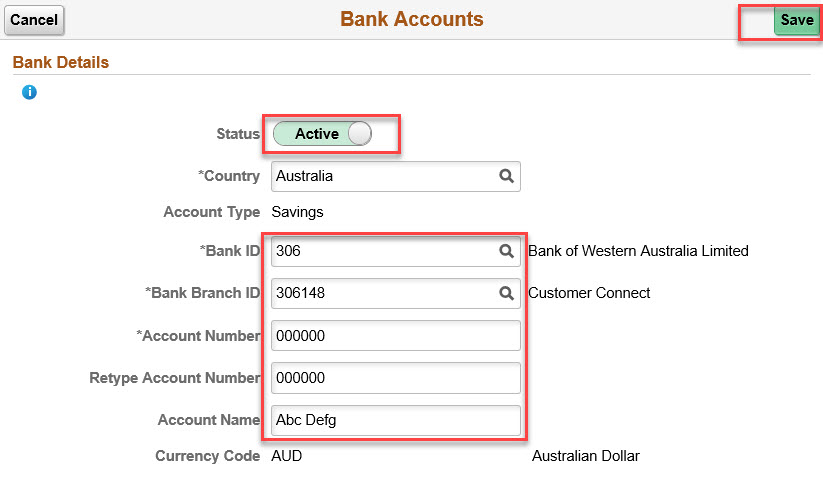
Input the Bank Id, Bank Branch ID, Account Number and Account name.
If you want to use this bank account, ensure that the status is set to "Active"
Select "Save".

Step 5
The bank account will appear in you list of banks accounts in the previous page.

Step 6
Updating or Adding a pay distribution
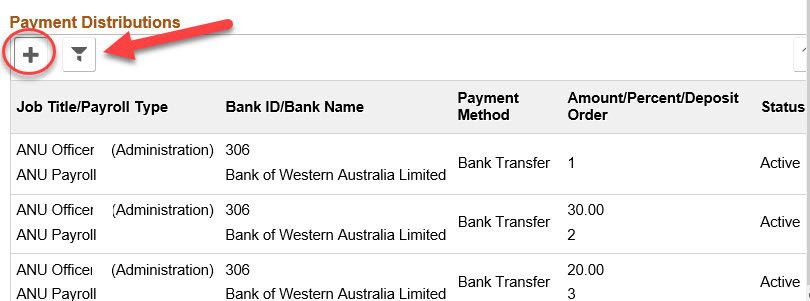
Once you have successfully added a new bank account details, you can create a pay distribution instruction. This is to tell the system how your salary should be deposited in the new account.
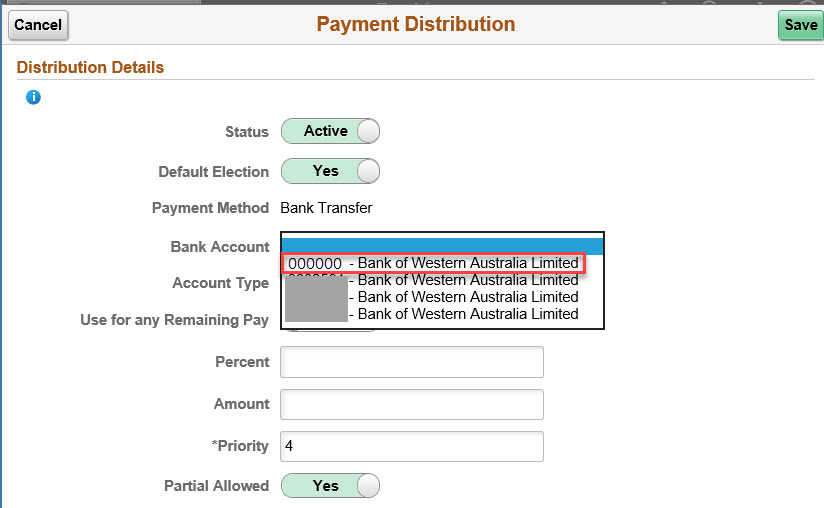
To update current distribution to the new bank account, click on the existing pay distribution line with the old bank account, chose the new bank account from the drop down list.
To add a new payment distribution, select the "+" option under the Pay Distributions heading.

Step 7
Pay distribution instructions terminology
Chose the relevant bank account from the drop down list
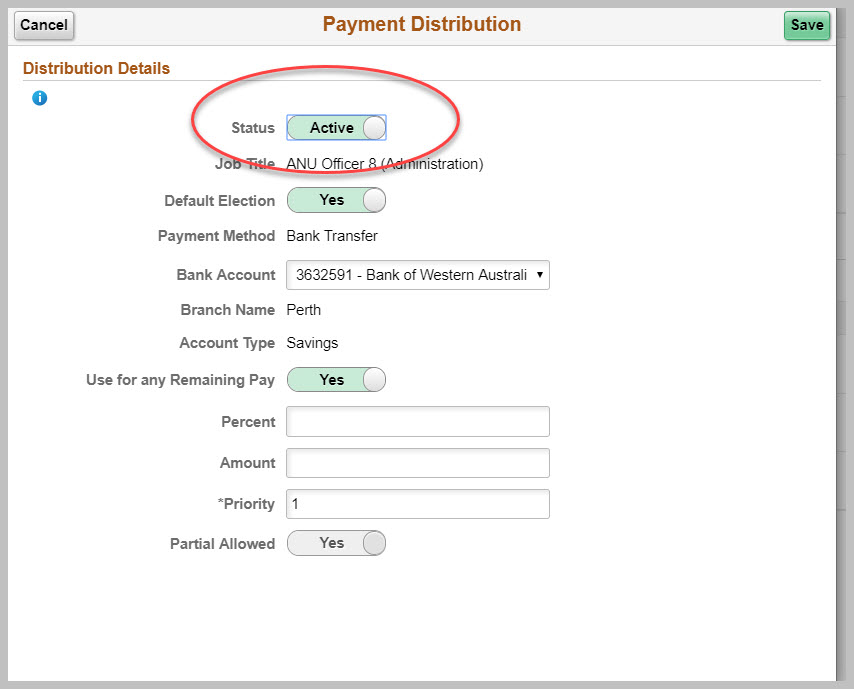
- Default election: You may have to specify instructions for each valid Payroll Type available to you. To use this distribution as the default for all Payroll Types, select the “Default Election” option.
- Primary Account: the account where all remaining pay goes into. At least one account is set as the primary account. Example: X is paid $500 each fortnight and he has 2 pay distributions, one for his mortgage with an amount of $300 per fortnight.$300 will go to the account for the mortgage and $200 will go to the primary account.
- Accept Partial Payment: ticking this checkbox means if the full amount you are requesting is not available, you accept for the lesser amount to be paid into the account. Using same example as above, let’s say for some reason (e.g. leave without pay) in one fortnight, X is only paid $200 and this is less than his nominated$300 for the account for the mortgage. Had X ticked this checkbox, system will pay$200 into the account for the mortgage and nothing in the primary account. Had X not ticked this checkbox, nothing will be paid in the account for the mortgage and$200 will go to the primary account.
- Priority/Instance Number: this determines the priority of the distributions. The lowest instance number wins then moves onto the next and so forth. Your primary account does not form part of the instance processing priority. For example, if X has 3 distributions and instance number 1 is his primary account, system will process instance number 2 then 3 in that order and the last transaction would be against 1.

Step 8
Remove redundant payment distributions
In order to remove a payment distribution, you will need to inactivate the distribution, noting that you cannot remove a primary distriubiton, ie. you need at least one distribution specified.
- Select the Payment Distribution you wish to inactivate.
- On the Payment Disbtibution page, change the Status from Active to Inactive.
- Select save.
- You will be asked to confirm that you wish to proceed with clearing the distribution - If you wish to proceed, select OK.
The bank distribution will dissapear from your Payment Distributions list
Note: you will not be able to remove a sole distribution.

Step 9
Removing a Bank account
In order to remove a Bank Account, you will need to ensure that there are no Active Payment Distributions setup for that Bank account.
You can only remove a bank account that doesnt have any active Payment Distributions.
From the Banking page, select the Active Bank Account details you wish to remove.

Step 10
Inactivate Bank Account
- On the Bank Accounts page, change the Status from Active to Inactive.
- Select save.
- You will be asked to confirm that you wish to proceed with clearing the distribution - If you wish to proceed, select OK.
The bank account will dissapear from your Bank Accounts list.
Note: you will not be able to remove a sole distribution.


Page Owner: Human Resources